How to Create an Online Course in 2024 (Step-by-step Guide)

You want to create your online course. But how? It seems simple enough, right? Use your knowledge and skills and share them with your students.
Plus, you’ll make a buck or two in the process. Sounds like a win-win! Knowing how to build your online course correctly is the key to making them successful.
Here, you’ll find everything you need to know about how to make an online course. From planning to publishing.
The best way to learn how to create an online course
Want to know everything there is to know about online course development? There’s one simple way to get there. Take an online course that teaches you how to create an online course.
Online course platforms will help you create your class, and while doing so, you’ll get plenty of inspiration for what they will look like.
Check out these 3 free online courses on how to create an online course:
Thinkific Fast Track Training (Free)
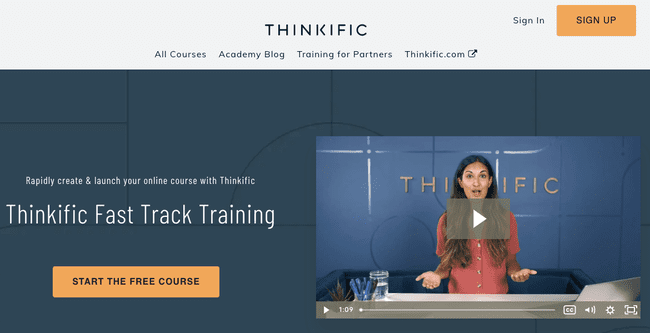
With Thinkific Fast Track, you can learn how to build your own! It helps you fast-track your way to publishing your online course in under 30 days, but most people will do that even faster. Thinkific says it already helped over 40.000 course creators get started.
We found it an easy-to-understand guide that focuses on the essentials. You’ll learn everything you need to know to create a successful online course. And best of all – it’s completely free.
What’s included:
- Welcome to Fast Track
- Create your Course – a guide to creating a course, adding lessons and support
- Create your Course Website – how to set up the course website with branding
- Publish your Course – add a price, set up checkout, then publish and test
- Running Your Business – how to manage students and users and analyze reports
- Finishing Up
LearnWorlds Academy
The LearnWorlds Academy has various guides on every aspect of successful online course development. Building a course from scratch, creating video content, and marketing your class. You’ll find everything you need.
Get free training from the LearnWorld Academy
Teachable
Teachable’s blog is a fantastic place to learn everything related to online courses. You’ll surely be off to a great start, from strategies to tried-and-true tips.
Learn course creation from Teachable
How to create an online course in 8 steps
The deeper you dig, the more daunting building your online course seems. The same goes for almost any new project or activity.
If you don’t know where to start, that is.
The first thing to do is take a step back and look at the online course creation process step-by-step. Things will become much clearer!
These are the 8 steps to creating your online course:
- Choose your subject.
- Validate the idea.
- Set income goals and price the course.
- Gather the information.
- Prepare an online course outline.
- Research and choose a platform.
- Create the online class content.
- Publish, market, and sell the course.
Let’s get you on your way to creating online courses.
1. Choose a topic for your online course

This probably comes as no surprise. But I’ll say it anyway. Choosing a topic to teach should be the first thing for course creation.
Is there one specific skill you want to share your expertise in? Then this is a no-brainer. But you don’t need decades of experience or a PhD to build an online course. All you need is to ask yourself these questions:
- What do you want to teach?
This can be anything that you’re passionate about. Topics you’re not committed to aren’t a great choice. After all, you’ll have to spend some serious time on it. The more you know about the topic already, the less research you’ll have to do. - What are you good at?
To make this choice easier, think about what people consider you an authority on. What are the topics they want your help with? You don’t need to be a recognized expert in the field, you just need to be good enough to add some value. - What do people want to learn?
This one’s a bit harder to pinpoint. There’s no point in creating online courses no one wants to buy, right? You want to find out if your topic and curriculum are interesting enough for people to open their wallets for your training. So it’s a good idea to validate your course idea.
Answering the first two questions will give you at least a list of ideas for online course topics. Once you’ve got your list, it’s time to test the idea.
2. Validate your subject idea
Check if you’ve chosen the right subject. This is essential to your online course’s success. So, I’ll give you a couple of methods you can use. More often than not, the best option is to use multiple. This will give you better results.
Two effective strategies are:
Creating a landing page
This might sound a bit strange. You haven’t even created the course yet! What’s the point of a landing page? Yes, the online course doesn’t exist. But you already know what you want to teach.
You’ll need 4 things to validate you idea. Great visuals, a clear description of the course and its subject, the expected learning outcome, and a great landing page builder. If you can put your idea into enticing words, you’re good to go. A landing page is a good way to collect email leads, too.
See what the public is talking about
Don’t underestimate online groups and forums. They can be your greatest source of insight! Look for any place where there’s a discussion on your chosen course topic. Facebook groups, Quora, and subreddits are great places to start. You can expand the search radius to more specific sites based on the topic. For example, DIY or gardening forums.
If you choose the second method, consider actively engaging with the community. Answer questions, share a tip or two, etc. I’ll talk about why this is important a bit later on.
As I said, the best tactic is using both a landing page and groups and forums. If you have an attractive landing page, you can share it with the community to pique their interest. It’s a great way to promote your online course before you’ve even started!
After some time, you’ll have enough data to analyze. This will show you if you’ve chosen a good subject that people are interested in.
3. Set your income goals and price the course
You now have your topic and a good idea of how many people are interested in such a class. The next step is to set clear goals for the online course.
This step can seem difficult, I know. How do you know how many people will buy the class? You haven’t even set a price yet! Don’t worry. It’s simpler than you think.
Setting target goals for your online course is one of the more important parts of the whole course creation process. It’s how you measure whether the class is successful. And what’s more, setting an income goal will help you figure out how much you should be selling it for. Let’s get into it.
First, you already know what the demand for your course is. You’ve validated your idea. With that in mind, set realistic goals. If you’ve only seen a couple of people talk about it online, you probably won’t be able to sell it to 100 others. But how exactly do you figure all this out?
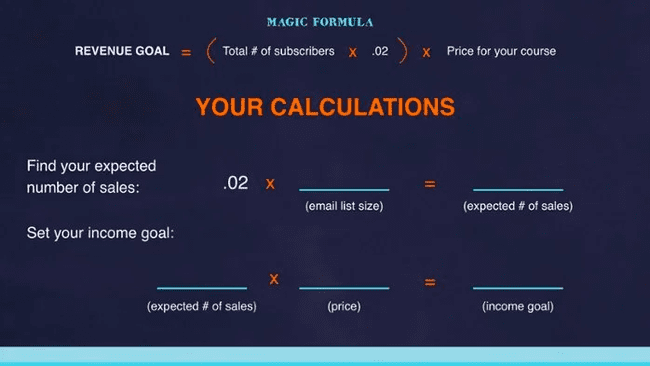
The folks over at Teachable have come up with a simple and effective formula you can use to set your goals.
Let’s break it down.
Expected number of sales
One of the most important parts of this formula is the number of sales you can expect.
The standard conversion rate is 2%. So, if you have an email list of 100 people, two of them will probably buy what you’re selling. From a list of 1000, you can expect to make around 20 sales. Pretty simple, right?
Just multiply the number of subscribers you have by 0.02, and voila! You have your expected number of sales.
Course price and revenue goal
This part is a bit tricky. Not because it’s difficult to calculate. Lots of people fall into the trap of either unrealistic expectations or underpricing.
I mentioned above that you’d want to set realistic goals for your course. Here’s how this plays into your pricing. Let’s say your revenue goal is $5000. If you set the course price at $200, you’ll need to sell it to 25 people to reach your target.
The two most common ways to go about this when creating an online course are:
- Set the revenue goal and the course price first. Then, use them to find the number of sales you need to make.
- Set the revenue goal and find the expected number of sales first. Then, use them to set the course price.
One way isn’t necessarily better than the other. It’s all about what works for you.
You might have seen the example price of $200 and thought, “Wow, isn’t this a bit expensive?”. That depends on how much value you’ve added to your online course. I’ll cover this in more detail later, so stick with me.
Once you’re happy with the revenue goal and the course price, it’s time for the real work to begin.
4. Gather your knowledge and information

Before you start working on your first online course content, you must prepare. That’s right – it’s time to research!
It’s safe to say you have a good idea of what you need to talk about in the class. So, gathering the information shouldn’t be too difficult. But you can make it even easier by simply paying attention.
What parts of the course material are people the most interested in? What are they talking about often? What do they want to know? That doesn’t mean you should only focus on these specific areas. But knowing your audience’s pain points will help you tailor an online course that helps them learn exactly what they want!
Now, when I say “research”, I don’t mean doing a few Google searches. If your students can easily find the same information online for free, then there’s no point in paying for the course, right?
So, go above and beyond! After all, you’ll want to provide as much value as possible, so your students don’t feel like they’re being ripped off.
5. Prepare an online course outline
Once you’ve gathered all the necessary knowledge and information, you can start organising it.
I know it’s probably not an easy task to just write a perfect course outline from scratch. But that’s ok! It doesn’t need to be organised immediately. You just have to start somewhere.
Keep in mind your research from the previous step. Start writing down everything you want to talk about. Don’t worry about the order yet. Just let loose a stream of consciousness! This can be anything you want to cover, from main topics to the smallest details.
Prepare a course timeline
Now that you have all your talking points, you can start organising them.
When creating an online course outline, think about an order that would feel natural to a beginner. Normally, this means starting with the basics – the ABCs – and diving deeper as you go along.
This can be difficult if you’re a long-time expert on the topic. After all, it’s been ages since you learned this stuff! But that won’t be the case for someone just starting. They probably won’t have any idea about things that you consider common knowledge at this point.
So, take the time to explain all the essentials to your students. Trust me, they’ll appreciate it!
Break down each lesson
You’ve already decided on a natural progression for the course. As with all other online courses, each lesson will have its own set of new information. You most likely haven’t written down every single talking point. So, now’s the time to do so.
Take the main subject of your first lesson. Then, write down everything you need to talk about. You don’t need to go into detail – after all, you should know your course material well enough by now.
Just make a simple bullet list so you don’t accidentally skip an important bit of information. If you need to, you can add bullets for each bullet, too. That way, you can be sure you won’t forget to mention anything.
Then just do the same for all of the remaining lessons!
These lists of talking points will act as a script of sorts. You won’t have to stop in the middle of recording and rummage through piles of notes to find what you need to talk about next.
Pro Tip: Make sure to include an introduction and a conclusion to the course. It will make the whole course feel natural. You’re gently introducing the course to your students, then recapping everything they’ve learned at the end. A short introduction and conclusion for each lesson or video can help your students retain the information.
Specify learning objectives for every lesson
Now that you have an outline for your lessons, set a learning outcome for each. You can include them in the video’s description or list them in the intro. Or both!
You should do this for the entire course, too. Still, small “milestones” are very helpful. They will give your students a sense of progression and accomplishment. And we all love being encouraged and feeling like we’re making progress!
6. Research and choose a platform
One aspect that can play a huge part in your success is where you choose to publish your online course.
If you have a website, you can easily host your course there. It’s not that difficult to do and gives you much more freedom. But an online course platform can be a great option for those who aren’t tech-savvy or just want to go the easier route.
The tough part is choosing the right one. It might seem more logical to create the course content and find a home for it afterward. It makes sense. But if you want to publish on an online course marketplace, you might have to work within certain restrictions.
You might have to keep the files under a specific size or the videos over or under a specific length. So, deciding where you want to host your online class can make a difference in how you create the content.
We put together a list of the best online course platforms. Here’s a shortlist of the 3 top ones we recommend.
Thinkific
Thinkific is one of the most popular online course platforms. They help you create and sell your online courses. The platform has easy-to-use features, email marketing tools, membership site integration, and 5-star-rated 24/7 customer support.
It is an all-in-one online course system, but you can also use it with your site and marketing tools.
Thinkific has a free version with unlimited students, 1 admin account, the drag and drop course builder, ecommerce tools, website templates, email and phone support.
Pricing starts at $74/month for the Start plan if you sign up for a year. The Start plan has unlimited courses, students, and content. Plus custom domain, coupons, promotions, drip content, one-to-one student emails, and Thinkific Academy Basic courses.
Try Thinkific for free or read our full Thinkific reviewLearnWorlds

LearnWorlds is another top online course platform for creating, selling and marketing your online courses. It’s almost an all-in-one teaching tool. It has more functionality to create amazing online courses and training programs than others.
You can add interactive videos with pop-up texts and quizzes, social learning, communities, and even interactive eBooks with note-taking.
LearnWorlds doesn’t have a free plan, but they’ve a 30-day free trial with all features.
LearnWorlds’ pricing starts at $24/month for the Starter plan if you opt for a yearly subscription. This plan includes 1 admin, custom domain, unlimited courses, website & popup builder, communities, coupons, payment gateways, drip courses, integrations, and email support.
Get Started with Learnworlds for freeTeachable
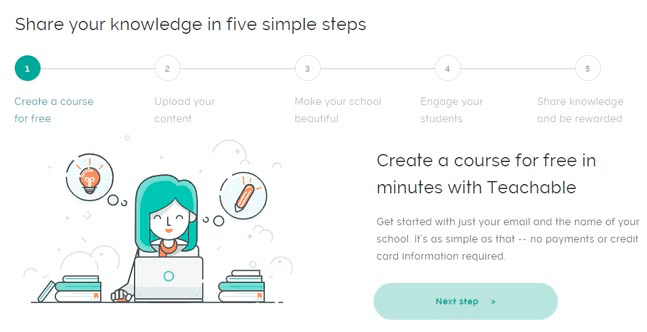
Teachable is a very popular online course creation software. They have over 124,000 instructors and over 28 million students.
The online courses look beautiful. Teachable is great for course creators to get started fast. You won’t be able to customize every small detail of your pages. In return, it is easy to use, and you don’t need any technical knowledge.
Get Teachable for free with 1 course, 1 admin user, unlimited students, website builder, referral marketing, payment processing, and email support.
Teachable pricing starts $29/month for their Basic plan, billed annually. It includes unlimited courses and students, 2 admin users, custom domain, integrations, and email marketing.
Sign Up to Teachable for free
Check out our full Teachery review, another noteworthy online course platform for WordPress.
I mentioned online course marketplaces above, so let’s explain them in more detail.
What is an online course marketplace?
There are so many hosting options out there! It’s easy to get lost if you don’t know what you’re looking for. Plus, you need your website to use most of them. That might not be a great choice for a first-time course creator.
Also, if you don’t want or need your website, there’s no point in creating one just for that one thing. But do you have another choice?
Yes, you do! A marketplace is a fantastic way to share your class with the world without any complex systems. It lets you publish and share your content easily. This makes it perfect for beginners!
You’re probably familiar with some of these platforms already. Skillshare and Udemy are by far the more popular ones out there. I’ll talk a bit more about these two later on, so stay tuned.
After you’ve found your course the perfect home, it’s time for the fun part.
7. Create the content for your online class

Before you start recording your content, make sure you’re familiar with the restrictions of your chosen platform.
There are several ways you can format your online course. But, the most popular one is video. So, that’s what I’ll focus on today.
Some people don’t feel comfortable in front of the camera. That’s fine! You can use a combination of slides and audio recordings, for example. It’s not even mandatory for you to speak. But giving the course a “face,” or at least a “voice,” gives it that personal touch. Students love that.
You don’t need any fancy equipment to create your content. High-quality production attracts more people. But people come for the value of your knowledge. So, don’t feel you need to spend a fortune on special cameras.
If you’re recording a video of yourself speaking, you can make it look professional with just a few tricks.
- Screen presence
One crucial aspect of making video content is knowing what you’ll be talking about. This doesn’t mean you need to memorize everything word for word. Just know what you want to say and have your list of talking points nearby. But don’t read off your script the whole time – just use it as a guide, so you don’t forget anything. Another helpful tip is to look directly at the camera while speaking. Don’t look at yourself on the screen or the camera viewfinder – this can often make a viewer uncomfortable. - Lighting
You don’t need a ring light to make a visually pleasing video. It helps, but you don’t need it. A good tip is to take advantage of natural light. If possible, position yourself close to a window and record during the day. You’ll get nice, natural light without investing in expensive equipment. - Sound
A good quality microphone is a helpful tool, but you’ll be fine using your phone or laptop to record audio. Whatever you use, don’t position it too close or too far away. If you do the former, the microphone might pick up some unpleasant sounds. If you do the latter, you might sound like you’re speaking from the other end of the room. - Editing
Take the time to edit your footage before you upload it. Cut out long pauses or parts where you’re rummaging through your script. You can fix the sound or lighting if you notice any issues, too. Adding titles and captions is also good practice. They will make your online course accessible and keep everything clear.
You may have decided to add even more value to your course. This can be a downloadable eBook, a progress test, or similar. Now is the time to prepare that, too.
Related: The 22 Best eBook Creation Software
8. Publish, market, and sell online courses
Publishing is pretty straightforward. After you’ve created your content, simply publish it to the online course platform you’ve chosen. The publishing process will likely differ depending on the platform.
If you think your job is done once your course goes live, think again! You need to keep marketing your online class and expanding your pool of students.
Notify your email list that your course is now live. Find more people interested in your course topic and let them know about it, too.
Course hosting platforms to sell your online class on
As promised, let’s talk about the two online course marketplace giants. Which one is best for you can depend on the topic or type of class you want to create, and each one has its advantages.
Skillshare
Skillshare works on a subscription model. So, a member can access all the online courses instead of buying a specific one. Most content on this platform is in the form of short, 10-25 minute videos.
Skillshare is known for the variety and quality of creative course topics. It’s not just a platform for artists. You can learn almost anything on Skillshare. Creative Topics, Web and Technology, Business, and Lifestyle are among the categories.
One of the best things about Skillshare is that the students can have open discussions and give course feedback. This platform also offers Partner and Teacher Referral programs to its creators.
Udemy
One of the most popular online course marketplaces out there, Udemy has every kind of topic. You can publish online courses in various formats, as well, so you’re not restricted to video.
You don’t need any technical knowledge to sell your course through Udemy. They take care of pretty much everything, including hosting.
Udemy is a great platform if you’re just starting. But, you’re not in complete control of your course’s price and the commission can be quite sizable.
Capping off Creating an Online Course
So, there you have it. You now have everything you need for online course creation. Let’s summarise the most important parts:
- When choosing the topic for your course, consider two things. What you’re passionate about and what people want to learn.
- Validating your course topic is important if you want to have a successful online course.
- Set your revenue goals early so you have a clear reference point later on and measure your course’s success.
- Take the time to research the subject extensively, even if you already know a lot.
- Prepare your online course outline so you know what to talk about, when, and how to pace the course.
- Choosing the right platform is important and can depend on your course topic or type.
- You don’t need professional equipment to create a professional course. Still, good lighting, proper sound, and good editing can help boost the appeal of your course.
- Once your course goes live, keep sharing and marketing it to people. Just because it’s published doesn’t mean you can forget about it.
- Various free online courses can teach you how to build your own.
Did you know? 67% of top course creators use “Free Courses” as a sales tactic.